Make a route with the program Garmin Connect
Tutorial by Olivier Letoublon (CC 7331)
I’ve been in the Club des Cent Cols for about 4 years. I have a Garmin Edge 1000 GPS that I use on my rides in search of new cols. I’ve tried to use ccWay with the BaseCamp program but it is very complicated.
Up to autumn 2017, I used the Garmin Connect program to prepare my trips. I made my route with Openrunner, then I took this on Garmin Connect in order to transfer it to my Garmin Edge 1000. Unfortunately, I couldn’t show, on the track, the exact position of the cols. On several occasions, I crossed cols without realising it (not consequently taking a photo of the col), or, more than once, missing a col because it required a slight detour that I had forgotten about.
For about 6 months, the Garmin Connect program has allowed the insertion of points on your route and, by this means, marking the exact position of cols. When the route is put in the GPS, it takes the list of cols and shows at what distance they are found.
This is how it is done :
In a web browser, go to https://connect.garmin.com/. Of course it can be bookmarked, but if you don’t have the exact address to hand, simply search «Garmin Connect».
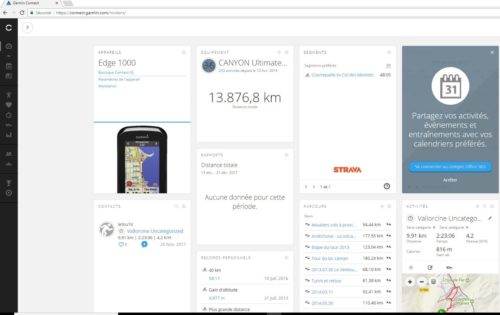
The Garmin Connect program starts.
Place your cursor over the vertical menu bar at the left of the screen.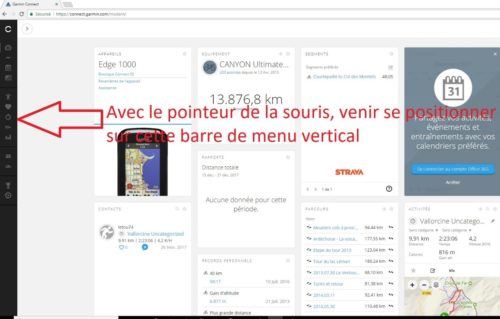
The menu bar widens. Click on the word ‘training’.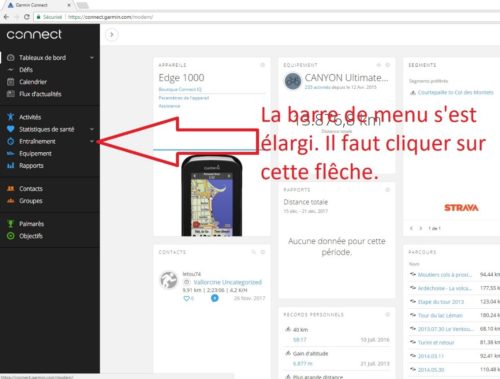
A sub-menu appears with four options. Click on ‘route’.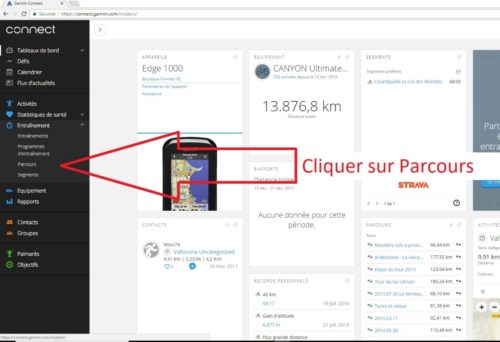
A sub-menu appears with four options. Click on ‘route’.
A new window, with a map, appears. Here you must choose which type of route – (road bike, VTT, gravel etc.). Once you have chosen, click ‘continue’.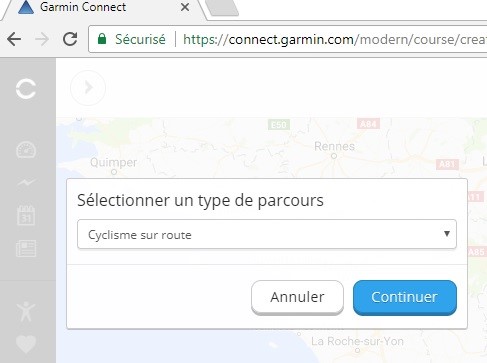
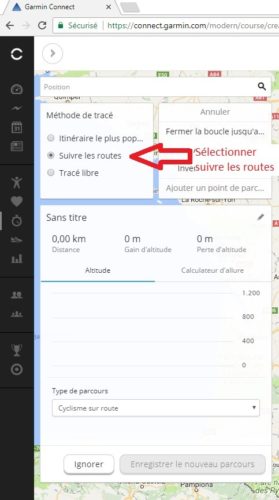
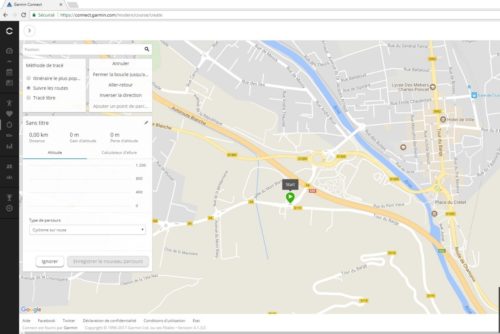
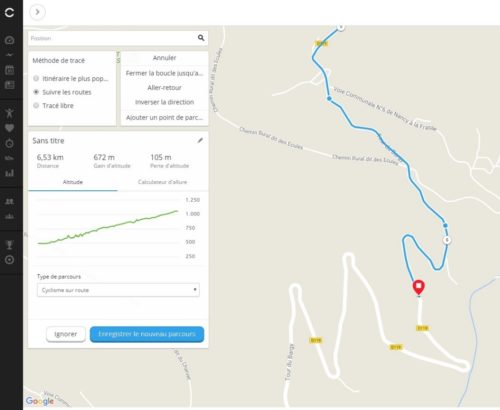
A new window appears. Select ‘suivre les routes’.
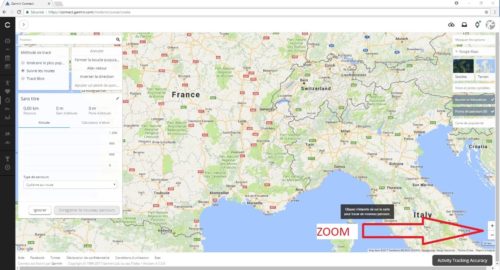
From here, you can start to draw your route. To zoom in or out, you can use the wheel on your mouse. If you don’t have one, use the zoom control at the bottom right of the map.
To move the map, left click, hold, and move the cursor (which has now become a hand). When you reach the start point of your route, click the point on the map. As an example, I will take the end of the Etape du Tour in 2018, from Scionzier to Grand-Bornand via Romme sur Cluses, le Reposoir, and the Col de la Colombiere. So I click at the roundabout just before the road that goes to Romme. A sign ‘start’ appears with a green arrow.
Then click along the course.
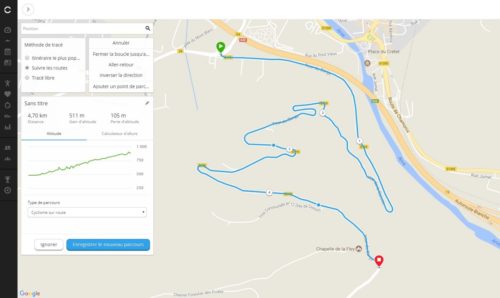
To follow, we click on the rest of the route. Fairly often, even if we have chosen the option to follow roads, the program will take tracks completely unsuitable for a road bike. When this happens, click ‘delete’.
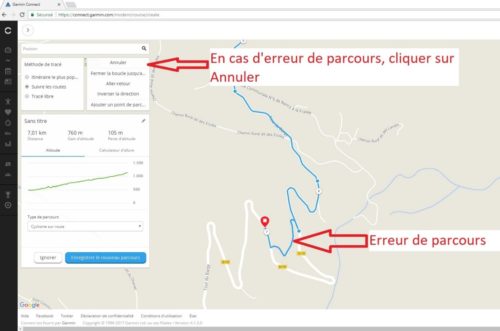
Clicking ‘delete’ only removes the last point on the route.
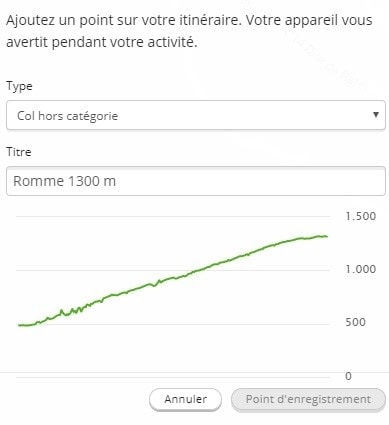
When we want to add a characteristic point to the route, here, I take the Col de Romme (recently recognised by the Club des Cent Cols). I click to add a point to the route.

A little window appears.
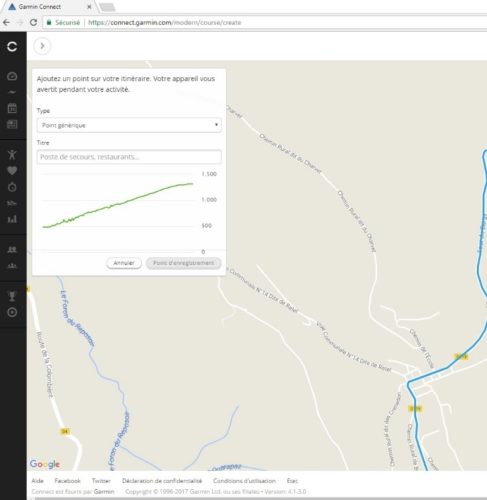
We click on ‘generic point’ and a menu appears.
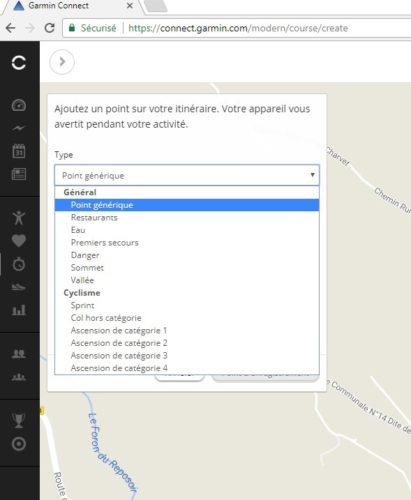
We choose the type of point we want. In this case, ‘uncategorised col’.
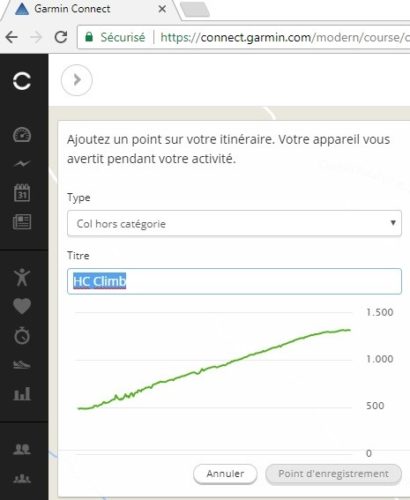
On the ‘title’ page, we give the point a name.
Then we click on the map at the relevant point.
This must be done with the cursor as a pointing hand. If it is a closed hand, the point won’t appear on the map.
Having clicked, an icon, (in this case ‘HC’) appears at the chosen point.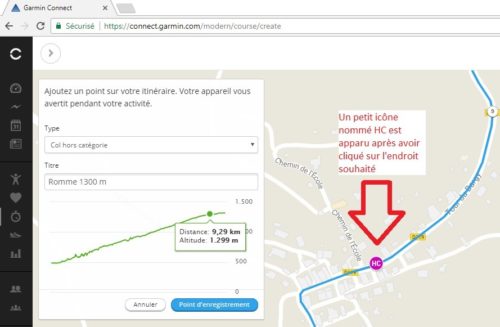
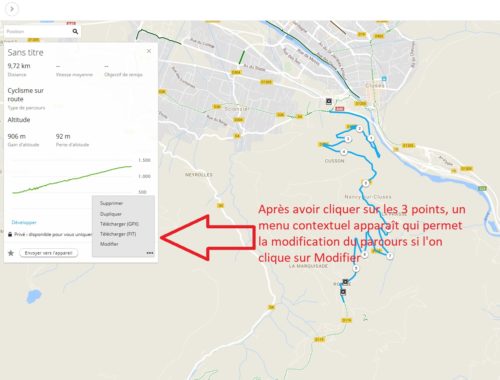
We can see can see on the left of the screen a panel, with the distance of this point from the start point, and its altitude. Click on ‘save point’ to record it. Repeat this operation for each significant point required. If we want to modify, or delete a significant point, put your cursor over it, and right click, and a window appears where we can modify or delete.
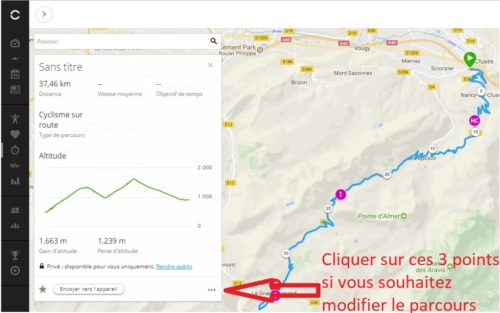
After clicking on three points, a context menu appears, which allows us to modify the route. To do this, click on the word ‘modify’.
At the end, this is what we get on the map.

When the route is finished, it needs to be sent to your Garmin GPS.

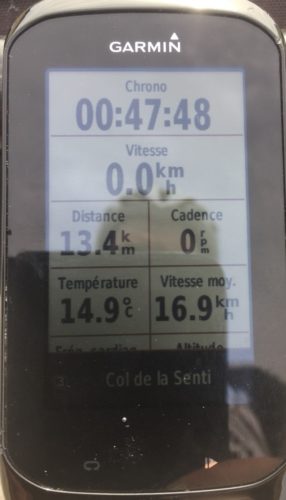
Click ‘send to your device’. This is done by the Garmin Express program, which must be installed on your computer. When the route is sent to your Garmin Edge, this is what appears on its screen. This example is from a ride in Switzerland above Lake Geneva.
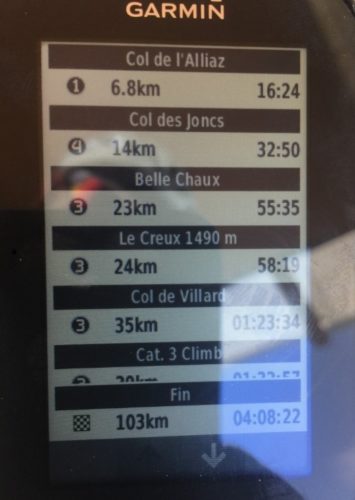
The first col (Col d’Alliaz) is 6.8km away, with an estimated time to arrive of 16 min 24 sec. The second col (Col des Joncs) is 14km away, and the estimated time to arrive is 32 min 45 sec. When we approach the col, it appears on the GPS map. (Col d’Alliaz).
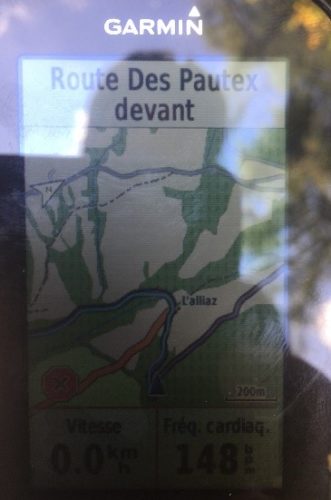
When we arrive at the col, its name appears at the bottom of the screen.