
Tutorial for declaring passes
1 – Create your list of cols
On a spreadsheet (Excel or equivalent) enter the code, name and altitude of each pass as shown below.
Example:

You can add a 4th column with the dates when you completed the passes (full date or just the year). This option is not necessary for the pass recording system, but it can be useful for managing your own list of passes.
For other formats, please refer to the detailed instructions on the website.
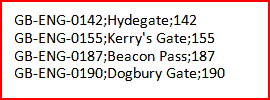
Or if you use a word processor (Word or equivalent) enter the same elements on a line, each separated by a semicolon.
Example:
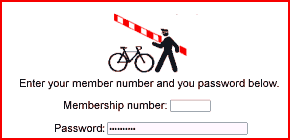
2 – Connect to the site
Connect to the members sections of the club’s site, with your membership number and password:
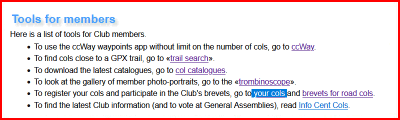
3 – Tools for members
On the next screen, under tools for members, choose go to your cols.
4 – Official declaration
Then choose claiming cols in the menu.

5 – Back to your list of passes
Go back to your list of passes (§ 1). Select all the table lines and columns (without the headings). This can be done with the mouse or using the keyboard. With Windows, click on Ctrl, hold down the key and hit A (shortened to Ctrl-A). Ditto with Mac where the Ctrl key is replaced by the Cmd key (to the left of the space bar). Copy the selection thus created using the right-click context menu. Or on the keyboard: Ctrl-C (or Cmd-C).
6 – On the declaration page
On the official declaration page of the site, place your cursor in the input box, then paste your passes: Ctrl-V (or cmd-V).

7 – At the bottom of the page
At the bottom of the page, choose partial or final declaration then send.

The partial declaration registers your passes, the final declaration also notifies your DT (Territorial Delegate) to validate the passes.
At the end of the year, if you don’t have any extra pass to add to your partial declaration, you can send a final declaration with any pass. A final declaration makes that all passes from previous partial declarations enter the final declaration.
8 – After sending
After sending, the system sends presents you a synthesis.

Categories 1 and 2 will be submitted to the DT during the final declaration; it’s okay, you can save the list (at the bottom of the page).
Other categories will indicate that there is a problem:
3: the code is found but the data is incomplete or inconsistent
4: the code is not found in the database
5: the code corresponds to a refused or deleted pass (but it may have been deleted during the year, so it may be acceptable, the DT will decide)
6: the pass has already been declared, or is a duplicate in this list
If you have one of these messages, you need to go back (correct the list at the bottom of the page) and find the possible errors: a mistake in the name (maybe confusing two passes), a mistake in the code, in the spaces, a totally inconsistent altitude, a full stop instead of a dash in the code, forgetting a letter at the end of the code, and so on. Tip: to make analysis easier, you can sort the errors by code number by clicking on the head of the category column.
Send the declaration again. If there are still errors and you cannot find them, before saving, contact your DT so that he can help you understand the origin of the errors. Please note: only codes 1, 2 and 5 will be sent to the DT.
9 – After confirmation
After sending, you will be presented with a link to review the data you have saved.
Finally, when your DT has processed your list, you will receive an email notification, with a link that will allow you to see if your passes have been validated.